The Sharpie Marker Manicure You Can Substitute For Nail Polish
We've all used Sharpie markers at some point for various projects, usually for school. The Sharpie website touts that they have many different types of markers available for art and writing. They also have countless options of colors and shades, so there's probably a perfect Sharpie marker out there for every type of marker project.
Believe it or not, some people use Sharpies to create nail designs, and they've created some of the absolute best nail designs we've seen. While we were surprised to see this, Sharpie marker manicures are actually pretty common now and might even become one of the nail trends you'll see everywhere soon.
We have some questions about if it's safe to use Sharpie markers instead of nail polish, but multiple Quora users have said that it's not unhealthy. One user who claims to be former creative director at a nail studio, said: "As long as you have a base coat on your nails (to prevent staining), you can use Sharpies to create nail art." Take that with a grain of salt, but if you're confident and want to try Sharpie marker nail designs, we found some cute ideas!
Have fun experimenting with marble and wood grain nails
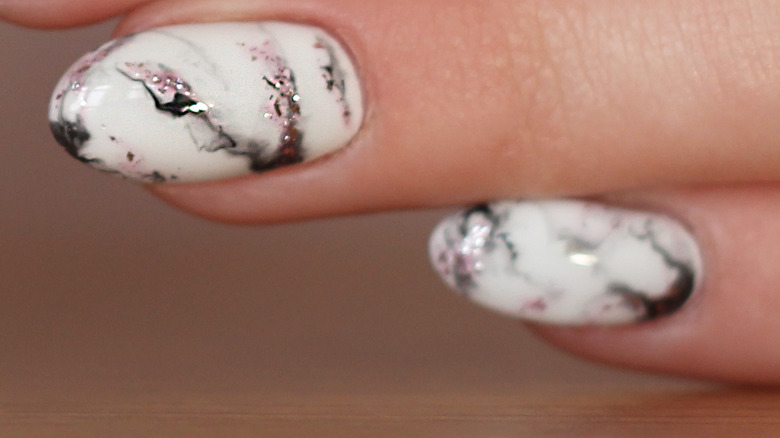
If you're feeling adventurous enough to use Sharpie markers to embellish your nails, there are a lot of design options out there, ranging from elegant to daring. According to Origins of Beauty Spa & Salon, a couple of examples of the styles you can create with Sharpie markers include traditional marble and wood grain looks.
To create a black and white marble look, you can start by putting on a few coats of white gel nail polish, then adding some lines on top with a black Sharpie. After that, you can gently apply 99.9% Isopropyl alcohol (commonly known as rubbing alcohol) to the lines you made with a nail design brush for a chic marble effect. If you don't like a simple black and white designs, try using a colorful Sharpie marker instead of classic black. Why not try a playful pink, seductive red, or soothing blue and see how it looks?
To achieve a wood grain look, start by putting on a few layers of gray nail polish. Next, add some vertical lines on top with a black Sharpie marker. Then, gently spread out the lines you created by vertically applying some rubbing alcohol over the nail. Feel free to add some glitter for a touch of glam!
Explore your artsy side with watercolor nail art
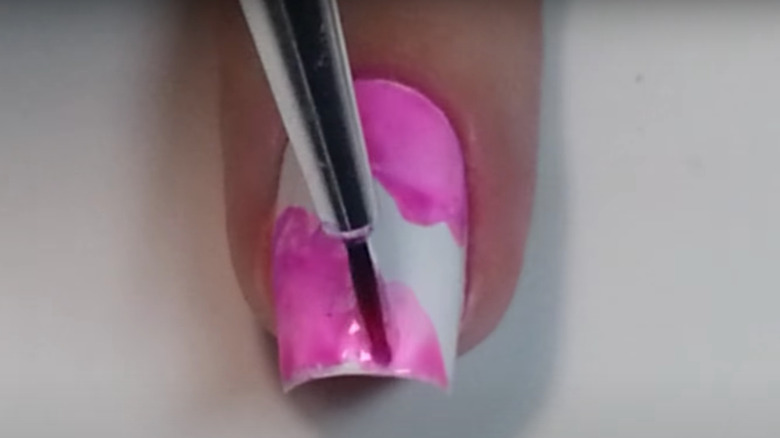
According to The Trend Spotter, watercolor effect manicures are trending because of their "dreamy" look. You can never go wrong with the watercolor look for a girly, beautiful vibe, especially if you have longer nails.
YouTuber Nails By Jema shared how to create watercolor nail designs with a Sharpie, explaining that to complete this look, you'll need three Sharpies in different colors, rubbing alcohol, a little glass, and a nail design brush. To begin making this design, put white nail polish on each fingernail. Next, color the bottom of the glass with a Sharpie marker in any hue you want. Then, put a couple of drops of rubbing alcohol in the dish and stir the nail art brush in it. Put this on your nails over the white layer. Then, fully clear out the glass and do the same thing with another Sharpie marker in any color you like and spread this on top of what's already on your nails. Next, repeat what you've been doing with one more Sharpie in another color and finish the look with a topcoat.