Five Unique Ombre Nail Looks To Recreate At Home
From winter nail art to blooming gel nails, nail polish is becoming an even more exciting way to express yourself than ever before. Ombre nails certainly aren't new, but, with an uptick in nail art trends, you may want to learn a thing or two about the wide world of ombre nails.
According to Glamour, what sets ombre nails apart from other nail polish looks is that they have the interest of complex nail designs with the ease of plain nail polish. In other words, you can create perfect gradients on your nails without being a talented artist with the steady hand of a surgeon.
You surely have a picture in your mind when you think of ombre nails, but there are actually lots of different styles and techniques for meshing multiple tones together. From sparkles to the updated French manicure, the options are endless — and you already have everything you need to DIY them at home. Here are five unique ombre looks that we love.
Ombre tips
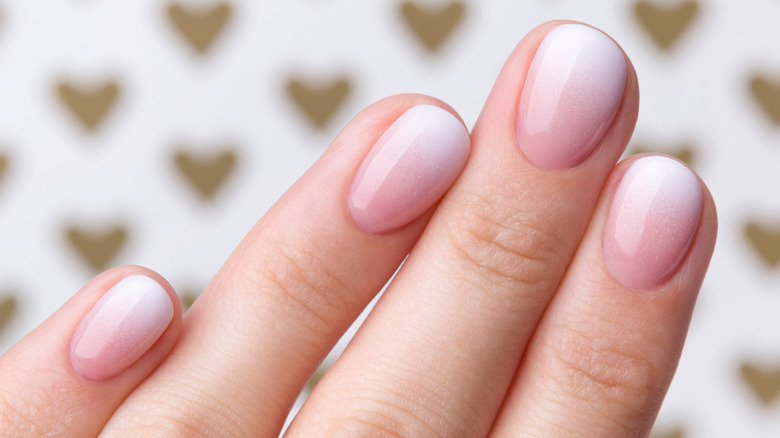
The French manicure is a classic, but it's notoriously difficult to get a perfectly straight line at the tip of your nails. Per The Zoe Report, with Y2K beauty trends on the rise, the French manicure is having a renaissance, but this ombre twist on the old style will make it feel fresh and way easier to apply without the help of a professional.
For an ombre French manicure, choose a nude or pale pink shade and a white. Alternatively, choose two shades of a similar color, one darker, and the other lighter. Apply the darker color to the base of your nail and the lighter color to the tip. Then, use a makeup sponge to press the center of your nails and blend the shades together. Finish with a shiny top coat, and you've got an updated French manicure without needing to paint any straight lines.
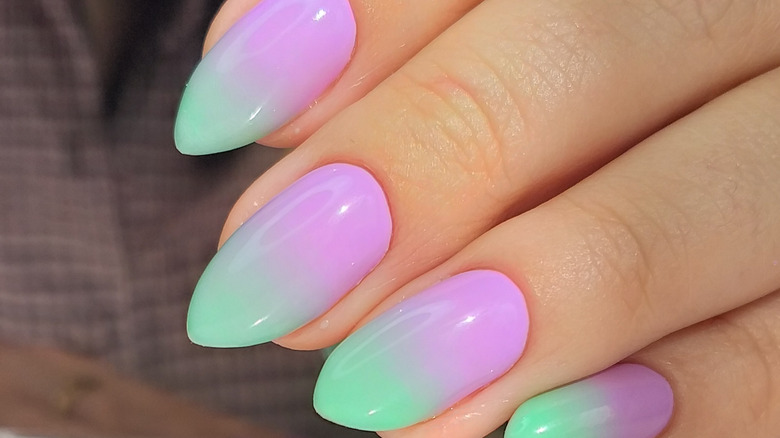
Vertical ombre
When we think of ombre nails, we usually think of a nail look that has a gradient that moves from one shade to a different shade between the nail bed and the tip. Ombre nails don't always have to change color from top to bottom, though, and switching the direction up can create a fresh, unique nail look. Nail artist and content creator @karanailedit shared what she calls Velvet Candy Cane Nails. This look has a gradient from one side of the nail to the other, rather than top to bottom, and it really does have a velvety-looking finish, like its name says.
She used red polish on one side and white on the other and blended the colors in between to get that candy cane look. We think this technique would look amazing with plenty of different color palettes, so don't be afraid to experiment with creating a side-to-side ombre with different colors.
Glittering gradient
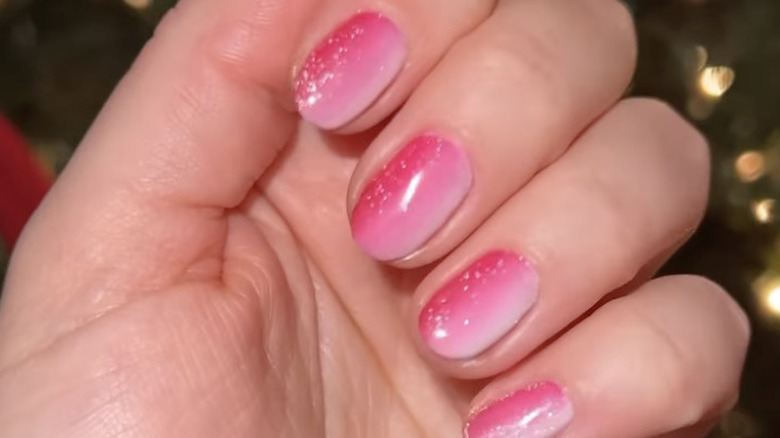
You don't just have to use two solid color polishes to create your ombre effect. If you're feeling a little fancier, you may want to opt for something sparkly. The @cutepolish YouTube channel posted a nail tutorial showing exactly how easy it is to get a perfectly glittery gradient nail look (via YouTube).
First, she paints the tip of her nail with a glitter nail polish, mentioning that this polish has both fine and coarse glitter. Then, she spreads the glitter polish down toward the base of the nail. She leaves the base of the nail bare and then applies a second coat of the glitter polish just at the tip of the nail to make sure that the ombre effect is obvious. Keep in mind that this also looks beautiful when reversed — with glitter at the nail bed that moves to a solid finish up top.
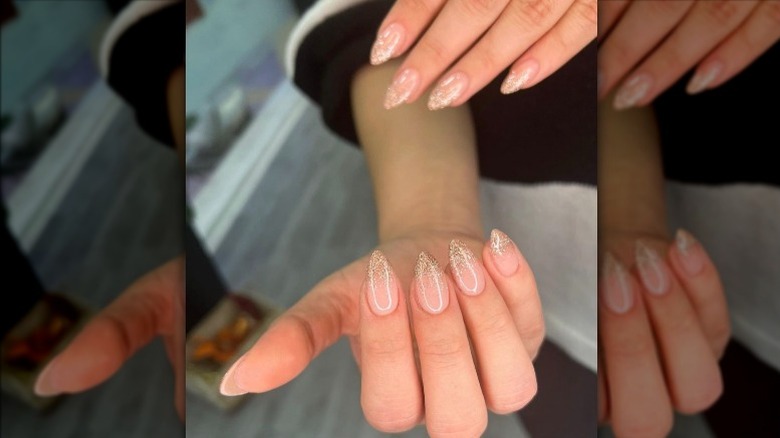
Ombre border
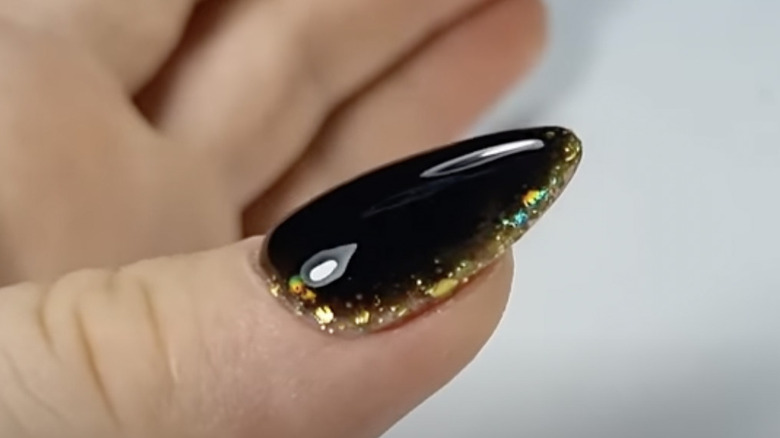
Another very cool way to add a glittery ombre effect to your nail design is to create an ombre border around your nails. Nail artist Inna Maksimova's YouTube tutorial shows exactly how to get this funky effect. She starts by painting her nail with glittery gold polish. Once her nail is covered, she applies black polish just to the center of the nail and spreads it out so it gets more transparent around the edges of the nail. She finishes with an extra-shiny top coat all over the entire nail.
We love this glittery gold-and-black combination, but we think that even solid colors would look attention-grabbing and sophisticated with this method. The key is to finish off with a shiny top coat to tie the whole look together.
Half-and-half
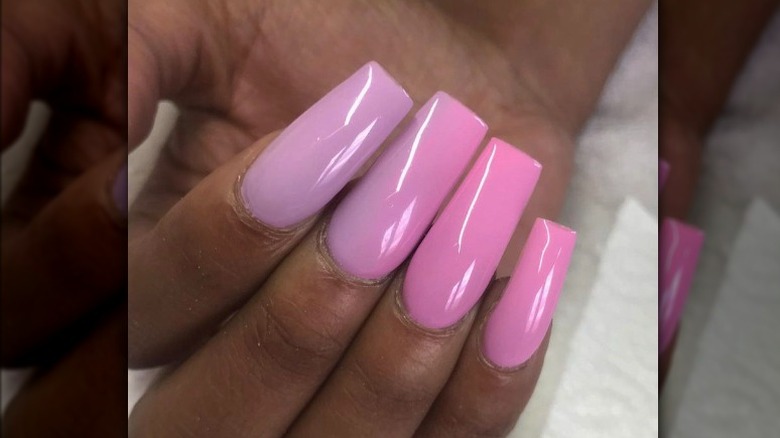
If you love ombre nails but want something a bit easier and less time-consuming to create, this technique is definitely for you. Per Glaminati, this half-and-half nail design allows you to create an ombre effect spread over all of the fingers on one hand, rather than on each individual nail. And, yes, this basically means you just have to paint the ombre effect on one single nail per hand.
Once you've selected the two colors you'll use for your ombre nails, start by painting your thumb and pointer fingernails one color and your pinky and ring fingernails the other. For your middle finger, you'll use the vertical ombre technique, painting one half of your nail the same color as the one next to it and likewise on the other half (via Instagram). Then, blend those colors in the middle. Presto: All your fingers look ombre, and you only actually had to apply the ombre effect to one nail on each hand. Now, that's working smarter — not harder — and the effect is totally unique.