The At-Home Nails Trend That K-Beauty Experts Say Is Here To Stay
Is it just us, or are do-it-yourself nails becoming more and more popular? With so many of us spending more time at home, it seems that everyone is hopping on the trend, ditching salon gel polish manicures for good.
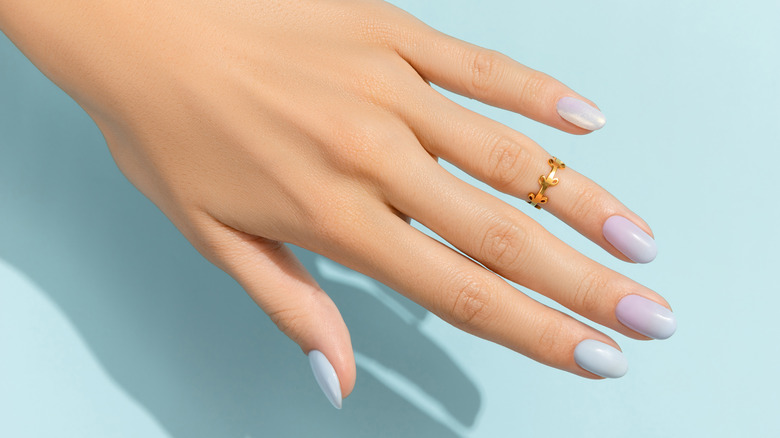
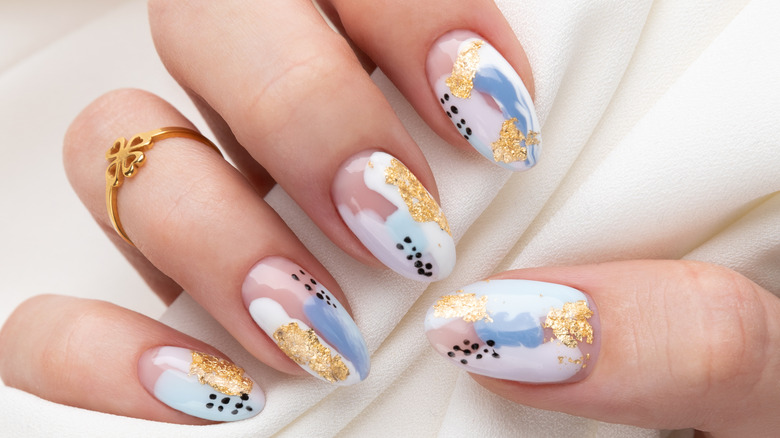
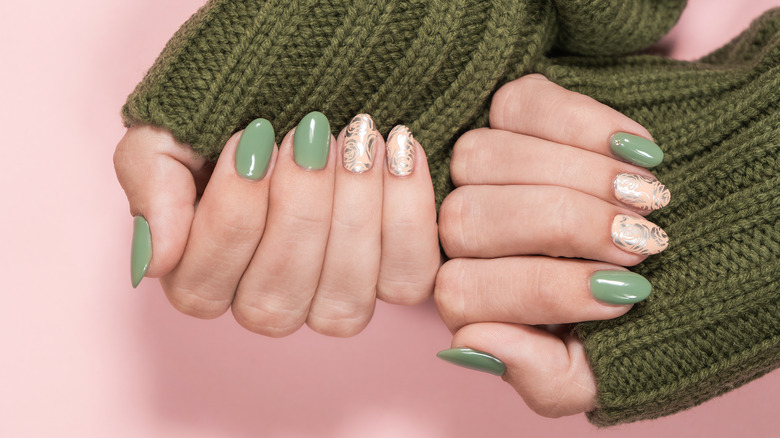
But that doesn't mean at-home nails have to be simple: As DIY manicurists like Instagram's @betina_goldstein and @banicured_ show, super-intricate nail art designs are everything right now. Sure, we have the Queen's favorite Essie shade, Ballet Slippers, in our cabinet at all times (via Glamour), but lately, we're ditching our nudes and pinks for metallic stripes, geometric styles, and even shapes like cherries and hearts. While simple nails are classic and elegant, this summer, we just want to have some fun — and we're starting with our manicures.
There's just one issue when it comes to DIY nail art: Unless you're an expert or have a super-steady hand, it can be hard to achieve exactly what you want. Your cherries might look like questionable red globs, while your Pinterest-inspired plaid nails might look much wavier than expected. Nail art has to be precise: Even if you're über-talented, it still requires lots of time and patience. We'll never get over watching TikTok videos of people effortlessly creating perfect leopard print, rainbow, and butterfly nails in a jiffy, but recreating that ourselves is just a bit harder than expected.
Luckily, there's a new, easy nail-art solution that we're kind of obsessed with — and it's K-beauty approved, so you know it's good.
Nail stickers are a big trend right now
So how to achieve perfect nail art from the comfort of your humble abode? As nail artist Jin Soon Choi told Byrdie, the answer is simple: at-home gel nail stickers (or wraps) and press-ons. According to the outlet, "gel stickers and press-on nails have gained popularity for their easy access and inexpensive price tag," leading many nail mavens to ditch the salon for good. While Choi notes that the stickers or press-ons shouldn't be too thick, that's where the possible negatives end. In truth, nail stickers are the perfect solution to all your manicure woes.
"Temporary nail options have exploded in the last six months, first with press-ons and now with stickers, which can be printed with a variety of designs and embellishments," per Coveteur. The possibilities are endless: minimalist neutrals, crystal-embellished designs, or deliciously kitschy looks with smiley faces and rainbows. Plus, "these aren't the stickers of the 90s," according to Coveteur, meaning they won't peel off by nighttime. Today's nail stickers are durable and can last up to a week, even after a beach or pool day.
It's no secret that professional nail art can be expensive. But these press-ons come in at a fraction of the price, making them the perfect budget alternative for cute mani designs. As Refinery29 explains, gone are the days of the cartoon nail decals often found at strip malls next to the Sour Patch Kids and butterfly clips. They've gone from "weighty gems to paper-thin peel-offs" that "create a covetable nail look in seconds."
How to apply nail stickers at home
While nail stickers are a lot easier than bringing out tiny brushes and trying a full DIY nail design, it's still important to know some application tips and tricks. As per Refinery29, you don't need "tons of tools," but there's still a process to follow.
According to Coveteur, you should first buff your clean nails to "eliminate any unevenness and ensure you have a smooth surface to apply your nail wrap." Then, file nails into your go-to shape, prep your cuticles, and, most importantly, clean your bare nails with polish remover. This will make sure your stickers adhere perfectly to your nail beds, preventing them from peeling off. Luckily, you don't need a base coat for press-ons, making the process even more cost-effective.
Next, it's time to apply the stickers. Peel them off the packaging (either with a tweezer or your hands), and make sure to place the press-ons as close to the cuticles as possible. Press them down with your finger, making sure to smooth out any air pockets, and cover your nails from end to end. Remove the excess at the tips with a nail file, keeping your handiwork extra-gentle to avoid trimming too much. As per Refinery29, your decals will last even longer with a good top coat since "self-adhesive only goes so far." Seal your mani by adding two layers of top coat — and voila! Perfect nail art in minutes from the comfort of your bedroom.
Shop these adorable nail stickers
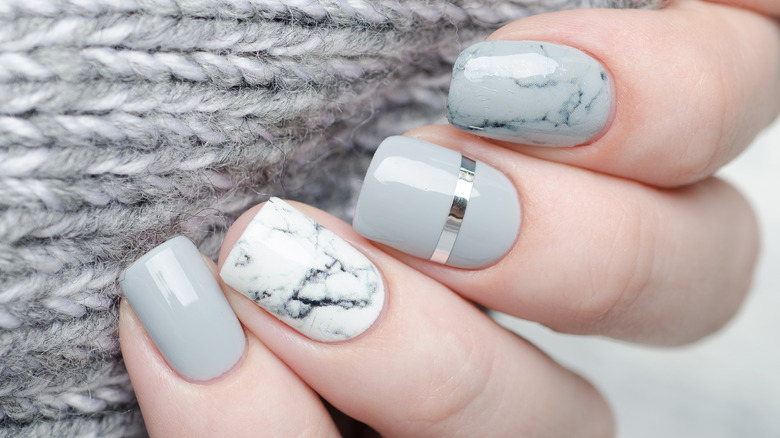
Now that we're basically nail sticker experts, it's time for the fun part: choosing your design. Go for Gen Z-faves like marigold smileys or cotton-candy-hued clouds, or opt for new classics like mattes with metallic touches or marble patterns.
Try Vanity Table, which features quirky TikTok-approved stickers perfect for summer. These gel nail strips are adorable and wallet-friendly, coming in at $14.
Chillhouse is another nail sticker brand we're loving right now, priced at $16 for 24 non-toxic, reusable press-on nails; a buffer; a file; a cuticle stick; and glue. A deal for the ages, we love the black-and-white Wavy Baby design and nude yin-yang Everything Zen for exciting neutrals. The so-sweet lilac Checked Out is a winner, too.
Another brand to try is ManiMe, which offers on-trend designs with easy, glue-free application (no UV lamp required). Whatever you choose, you truly can't go wrong!