How To Give Yourself A Marble Manicure At Home
ICYMI, nail art is back. No, we're not talking old-school stickers and prints, but elegant, sophisticated nail designs — from color blocking to checkerboard prints. And if 2021 taught us anything, it's that when it comes to beauty upkeep and self-care, we can actually do a lot of it at home. So save the money you set aside for a manicure, and try some of the best nail designs at home instead.
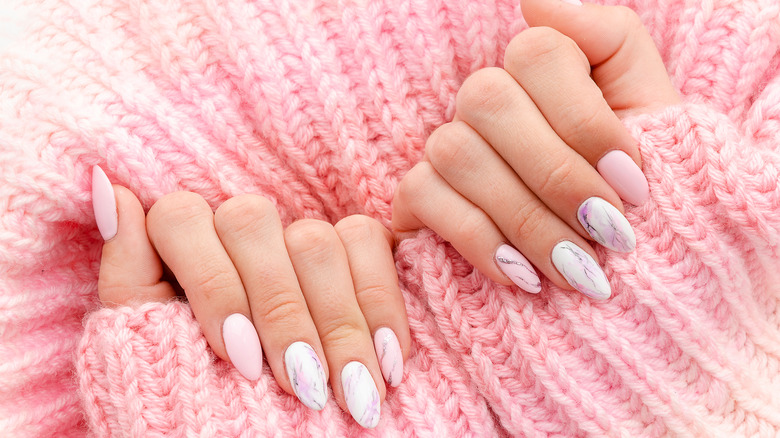
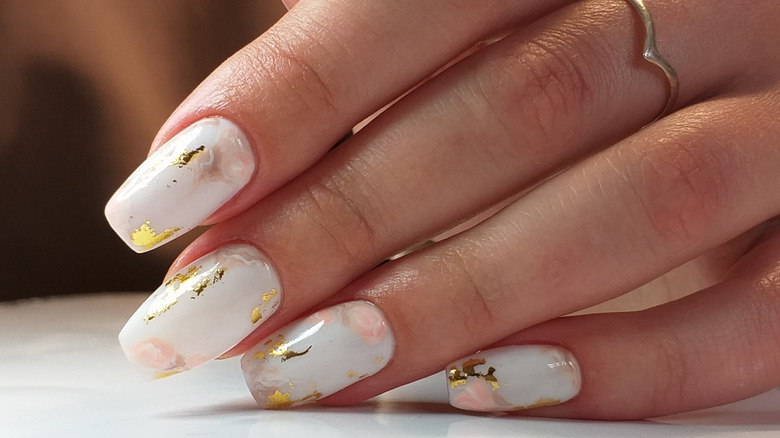
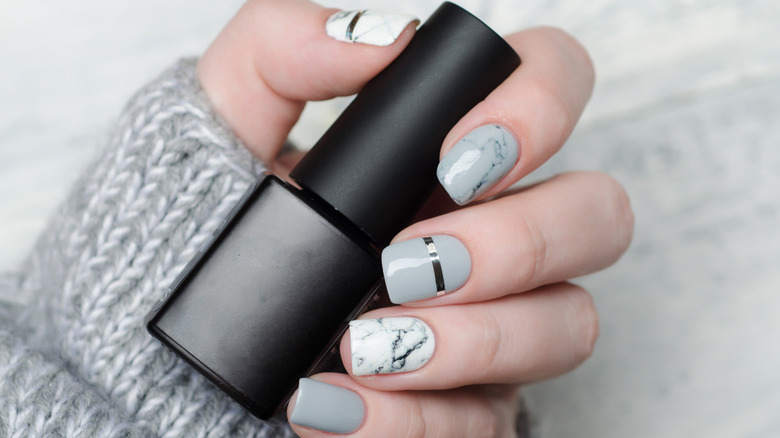
Marble manicures are at the top of the list. Inspired by the same swirling design you might see on kitchen or bathroom counters, marble manicures are imbued with sophistication and they're gaining more and more popularity, too. The trend has racked up nearly 2 million posts on Instagram under the #marblenails hashtag. With a wide range of colors, the beauty of a marble manicure is that you can customize the style in any way you wish. Go bold with vibrant swirls, or stick to neutrals and cloudy pastel colorways. Lizzo's nail artist shared a brown marble mix in January, whereas Kylie Jenner posted an orange and red swirled manicure.
Keep scrolling to learn how to create the perfect marble nails manicure at home.
Perfect the marble manicure trend in just 5 easy steps
Giving yourself the perfect marble manicure nails at home is super easy, so what are you waiting for? First, gather everything you're going to need to create the trend to make it easier on yourself. You'll need everything you would need to give yourself a manicure — including clippers, nail files, and cuticle pushers — plus your chosen base color, one or two other colors for the "swirl" effect," a top coat, and a small brush.
Christina Klug of the nail salon Paintbox in New York City told Today that creating a marble manicure at home can be as easy as five simple steps. Firstly, after you have prepared your nails, apply one or two coats of your base color. Once the base color is dry, make really small and random dots with the additional colors. Next, return to the original base color and add some dots of that color to mix. Then, using your small brush to swirl your colors into the marble pattern. Klug also told Today you can add some alcohol or nail polish remover to thin the varnish at this point if it's easier. Finally, add your top coat for a long-lasting, elegant manicure.
You can also use the water marble method to achieve the same look
First things first: What are water marble nails, and how do they differ from a normal marble manicure?
According to Sarah Gibson Tuttle, the founder and CEO of Olive & June, "It's a nail art technique where you place drops of nail polish into a cup of water to create a beautiful swirl of color on the surface that will then be used to create a marbleized pattern on your nail" (via Byrdie). For a normal marble manicure, you put the nail varnish on the nail to swirl, whereas with water marble nails, you put the nail varnish on a water surface first and then swirl and dip in the nail.
To get started, gather everything you would need for the usual marble manicure, but this time add a shallow bowl of water and a toothpick, too. Prepare your nails as you would for a normal manicure and apply two coats of your base color of choice. Once your base color has dried, get your bowl of water and add dots of your chosen marble colors to the water's surface and swirl with the toothpick. Gently dip your finger into the water covering your nail with the swirl design. Wait a few moments for the polish on the surface of the water to dry, gently lift up your finger, and repeat for all of your nails (via Byrdie). Get ready to receive plenty of compliments on those beauties!