Floral Nail Ideas That Will Turn Your Hands Into Mini-Gardens
Never underestimate the confidence-boosting power of a nail appointment. A good manicure has the ability to make you feel fierce and feminine, adding a personalized and polished element to your signature style. Whether you like to keep your nails cut short or prefer to sport dagger-like stilettos, dabbling in nail art is a fun way to jazz up a plainly polished slate. And when it comes to nail art, there's no look more classic than floral embellishments.
While your mind may initially go to those tacky, outdated flower designs you used to see at mall nail counters, manicure art has received a serious upgrade in recent years. Whether you desire a nail look inspired by the edgy '90s or a mani that is fully femme, there's a flower-forward modern nail look for you. Want to amp up your next manicure with a floral pattern? Check out these 14 flower designs that you'll never want to see chip.
Sunset 3D Floral Manicure
If you want your floral manicure to have a 3D touch, get crafty by molding acrylic flowers directly on your nails. After laying down an acrylic base, use a nail brush to place colored acrylic beads on your nails where you want your flower petals. Then, press gently in the center of each bead to create a creased 3D petal. To make the nail art even more special, use rhinestones as the flower center for sparkle.
This manicure — which was created by Instagram user @klawsbykalee — takes patience and a lot of skill, so there's no shame in enlisting the help of an artsy friend or a professional nail artist to get it right. If you've never worked with acrylic before, it may be better to get used to laying down the perfect nail base before jumping to 3D florals. But nail art can also serve as a way to artfully cover any potential mistakes as you're learning the skill, so you should be fine.
'90s Floral Nails
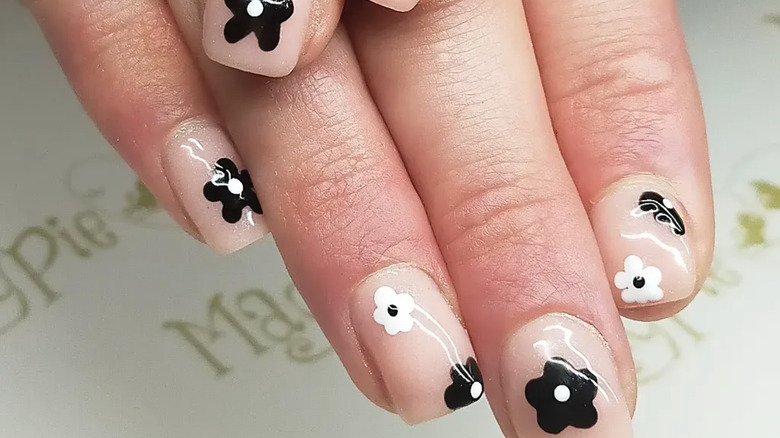
Five-petal, poppy-like flowers were all the rage in the '90s, and this black and white manicure by Instagram user @amalfinails revives the trend. This design is easy to recreate on your own with some patience and a steady hand, but you can always enlist a friend to help if you struggle with at-home nail art.
Simply use a nail dotting tool to create the five joined dots in a circular pattern. Then, add a contrasting dot in the center where the petals meet. It's as simple as that. You can wiggle the dotting tool around a bit to create larger petals, or lay down precise dots for smaller blooms. Additionally, varying the flower sizes will add some dimension to the nail art, making your design pop. Though black and white may be a classic '90s combo for this floral style, you can try any contrasting colors to make the look entirely your own.
Floral French Manicure
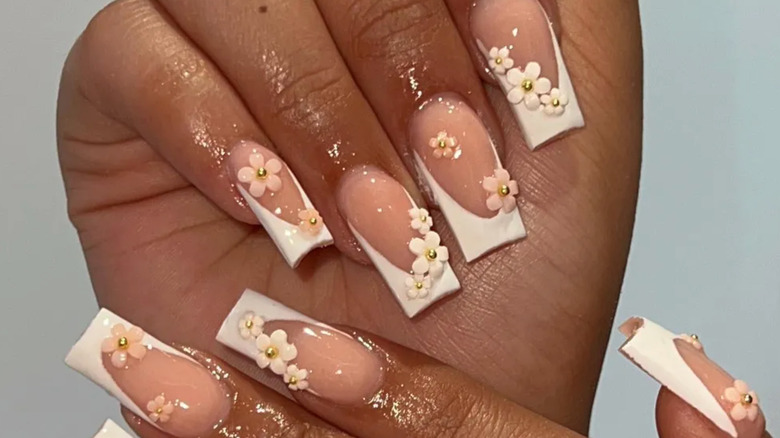
If a French manicure is your usual go-to nail style, you can still jazz up your mani with some floral accents. Whether you decide to scatter your nails with 3D acrylic flowers — like this exaggerated arched nail set created by Instagram user @naailssbysteph — or prefer classic, painted-on petals, adding flowers to your French manicure is a way to amp up the femininity on an already classically femme design.
Creating a crisp French manicure, especially when using acrylic, takes a lot of skill. So, this design is likely best left to the pros. If you have a particularly steady hand and want to give a painted French manicure a try at home, YouTuber Michellekhxn breaks down hacks for how to best paint your tips with a white polish. No matter how you choose to replicate the style, you can't beat a vintage pattern with a subtle twist.
Negative Space Nails
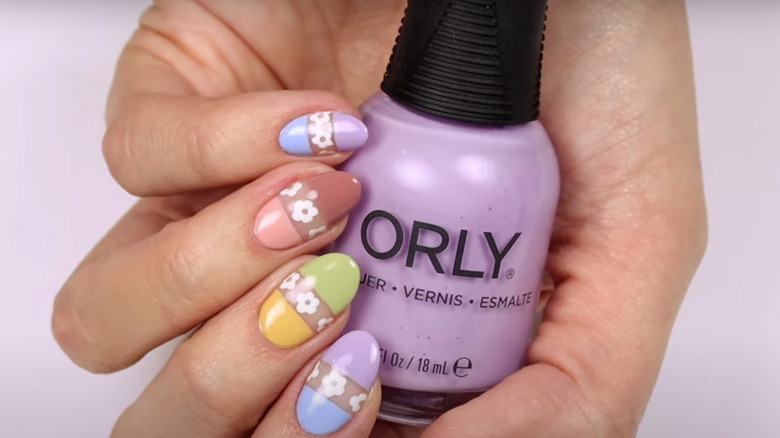
Try your hand at negative space nail art that won't be hard to execute, like this floral pastel design by YouTuber HannahRoxNails. To recreate it, start by laying down a clear base coat. Then, take a thin strip of tape (painter's tape is a great choice if you don't have dedicated nail tape on hand), placing it on the middle of your nail. Paint above and below the tape with one or two colors, depending on your mood.
After removing the tape, fill in the non-polished space with flowers using a nail dotting tool. You'll likely be able to fit at least one full five-petal flower at the center of your nail. Then, dot half-flower designs on each side of the flower in focus. After adding a glossy top coat, this manicure style looks completely professional — and thankfully, you can do it yourself while watching Netflix.
Floral Boarder Nails
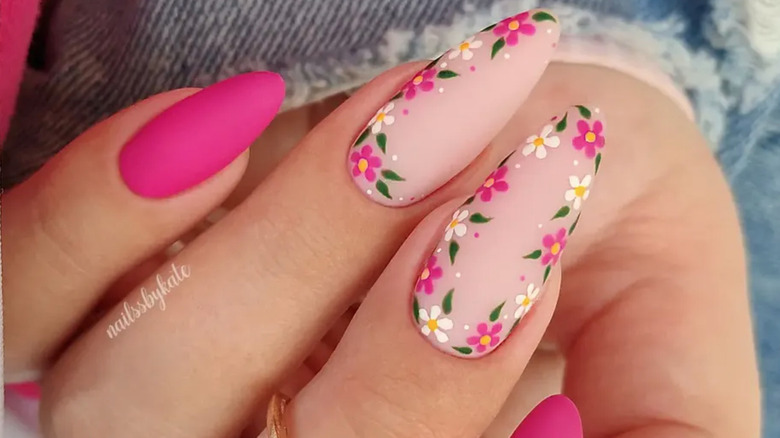
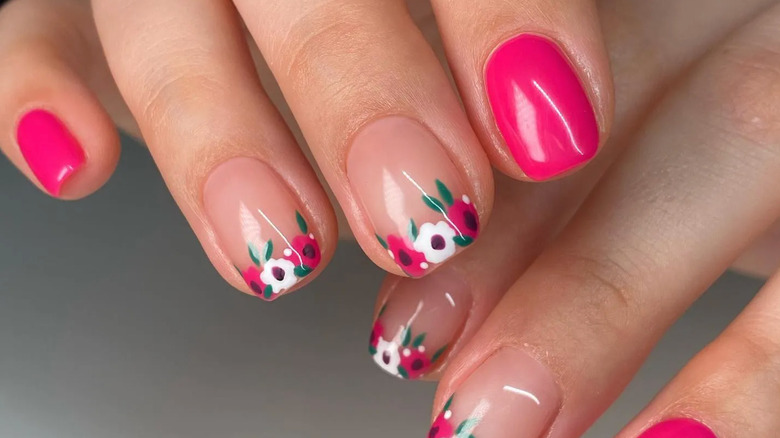
This delightfully feminine floral mani, created by Instagram user @nailssbykate, features two accent nails bordered in delicate flowers. To recreate the style, paint most of your nails in one solid color, switching to a lighter tone for an accent nail (or two) on each hand. Then, grab a nail dotting tool and create small, precise five-petal flowers bordering the accent nails. Use two different colors for the flower petals, one being the darker hue painted on your non-accent nails. Make sure to dot the flower centers with cheery yellow polish. Next, use a small nail art brush to paint delicate green leaves near the blooms. You can even add some scattered accent dots in your chosen petal colors to fill in the border design, like @nailssbykate did for her manicure.
While you can border your whole nail in florals, there's something sweet and whimsical about an asymmetric design, which features the floral boarder on only one side of your nail. (Not to mention, it's only half the work.)
Extra Cute, Extra Cheery Nails
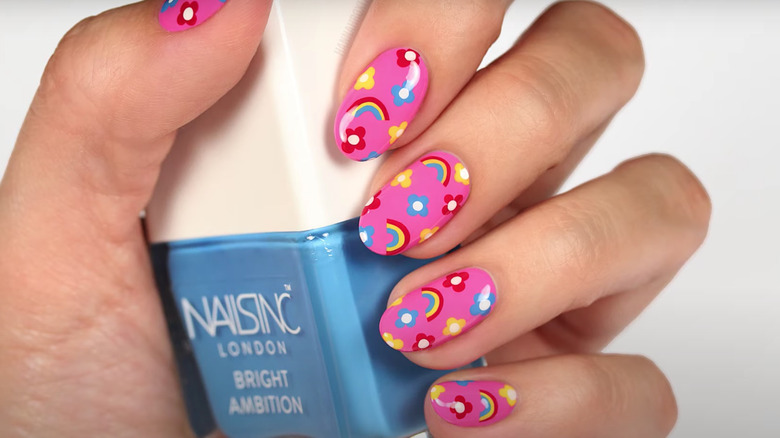
Not all floral nails need to be heavy on the elegance. For a cheery and casual nail look, pair simple flowers with rainbows and get a spectacular summery style. If you have a steady hand, you can recreate this manicure look at home, just like YouTuber HannahRoxNails. Start with a vibrant base, then use a thin brush to paint a three-stripe rainbow on your nail. Pro-tip: You can clean up the ends of the rainbow with your base color. Using the same colors as your rainbow, create four-petal flowers using a nail dotting tool. Simply make four dots in a circle, adding a white dot to the center. Seal in the nail art with a good-quality top coat to make the design will look glossy and smooth.
If you are intimidated by this design, nail decals can also do the trick. If all else fails, enlist a professional nail artist to make this look a reality. It's certainly worth the splurge.
Freehand Floral Nails
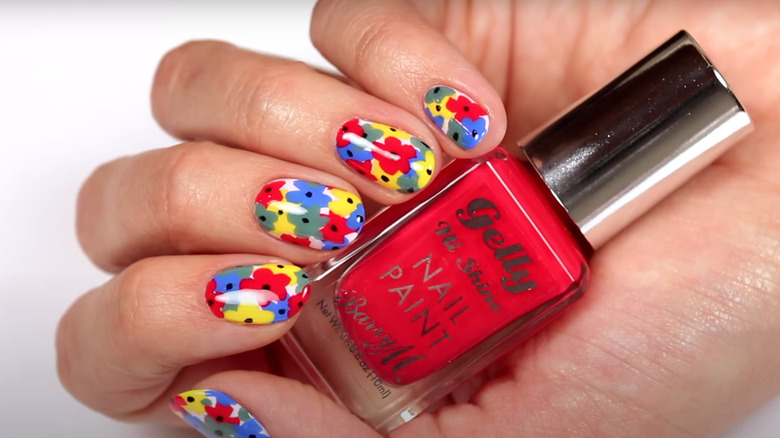
You don't need any nail art tools to recreate this layered flower manicure by YouTuber HannahRoxNails, even though it looks like a professional design. All you need to get this floral nail look is four colors of nail polish for the blooms, plus a black shade for the center of the flowers and a white shade for the base coat. The rest is just maneuvering the provided nail polish brush to get your desired effect.
To get the look, use the each bottle's given nail brush to carefully paint five-petal flowers on a white base coat, embracing the lack of uniformity and imperfect strokes. Go for one color at a time, gradually layering the blooms on top of one another for a dimensional look. To get the black center of the flower, dot carefully using the provided nail brush, or grab a toothpick from the pantry for more precision. Everyone will think this mani is totally professional, even though it requires zero special tools.
Flower Crown Nails
Flower crowns aren't just headpieces for summer festivals — they're also for your nails! This sweet accented floral manicure created by Instagram user @nailedbyrebeka is super easy to recreate by yourself, even if you aren't pursuing a nail career.
To start, choose an accent nail or two to feature the florals. Then, choose two coordinating colors for the blooms. Paint your non-accent nails solid with one of the bloom colors you chose, laying down a nude base color on your accent nail. Once your nails are dry, use a nail dotting tool or a nail brush to create three five-petal flowers running across your accent nail tip, adding a dark-colored dot in the center to complete the bloom. Don't forget to add green leaves around the flowers to complete the crown. The emerald detail really sells the flower crown look, adding a certain pizzazz to this fabulously feminine nail art.
Black and White Nails
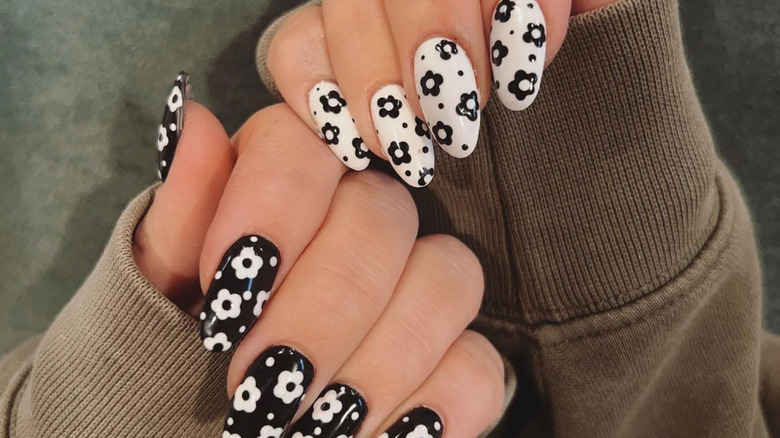
Forget what you've heard: Manicures definitely don't need to match perfectly on both hands. For an unexpected floral manicure that's beyond eye-catching, try this monochromatic nail design by Instagram user @nailsbymk_.
First, paint your nails black on one hand and white on the other. Then, use a dotting tool to create white five-petal flowers on the black base and black five-petal flowers on the white base. Dot the centers of the flowers with the respective base color for a negative-space center. And be sure to add some scattered polka dots to help finish off the design. The inverted design is something you can recreate at home with a dash of skill and a heap of patience. But this look is entirely worth it — and will make your nails the envy of all.
Climbing Vine Nails
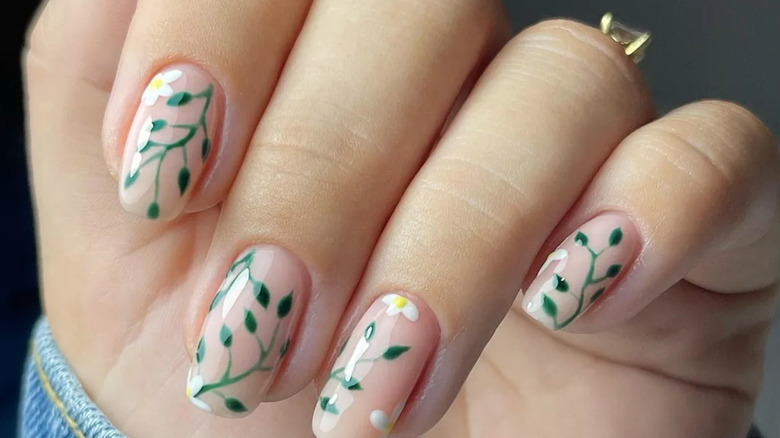
If big blooms just aren't your style, consider decorating your mini nail canvases with some elegant vines and scattered, smaller blooms. You can recreate this divine look by Instagram user @beautyhaven_byjodie using a tiny nail brush, a nail dotting tool, or just a plain ol' toothpick. To create the vines on your polished nude base, take a deep emerald green polish and extend an imperfect branch-like line from one edge of your nail — be it the cuticle, the tip, or the side of your nail. Then, add off-shoots extending from that main stalk, creating simple leaves at the end of each shoot. While you can leave your mani just featuring vines, adding a few scattered blooms drifting off your nails adds even more to the look.
The best part of this floral nail art is that it is ridiculously easy to recreate. Consider it the perfect manicure to work on while watching half-watching reality TV on a Saturday afternoon.
Dried Flower Nails
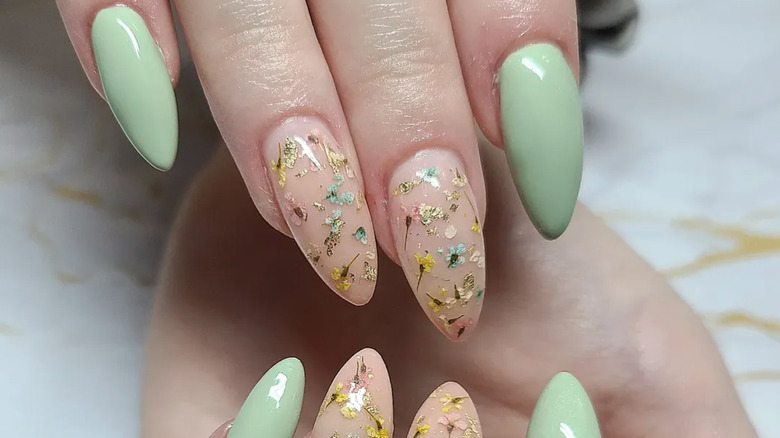
Yes, you can put actual flowers on your nails to get a dreamy, floral look. Dried flowers can be encapsulated in acrylic on your nail, making for a natural type of floral nail art. Just take a look at this gorgeous set created by Instagram user @rebelle.nailco.
It's best to leave this one to the professionals, as working with acrylic and gel is way harder than it looks. A pro will lay down a thin acrylic base, then place dried flowers on the base, using a liquid monomer to press the florals down. Then, the nail artist will further build up the nail with another layer of acrylic, sandwiching the dried flowers in between the layers. After curing the nail, the florals will be molded to your nail and won't budge, even while being filed to perfection. You can even ask your nail artist to throw in some gold flakes for a shimmery, luxe touch.
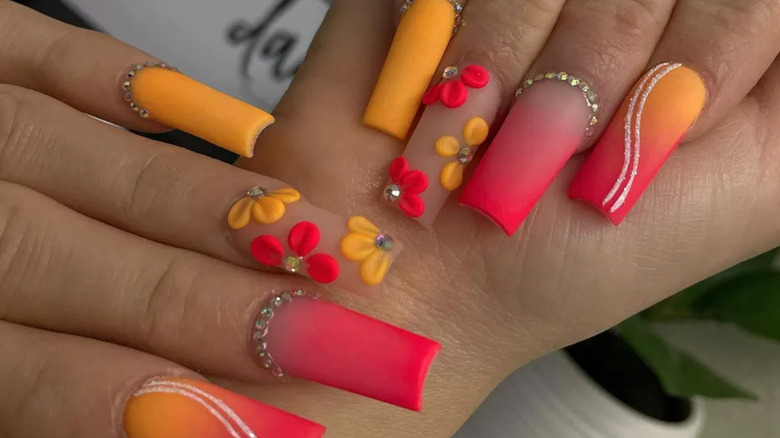
Funky '60s-Inspired Nails
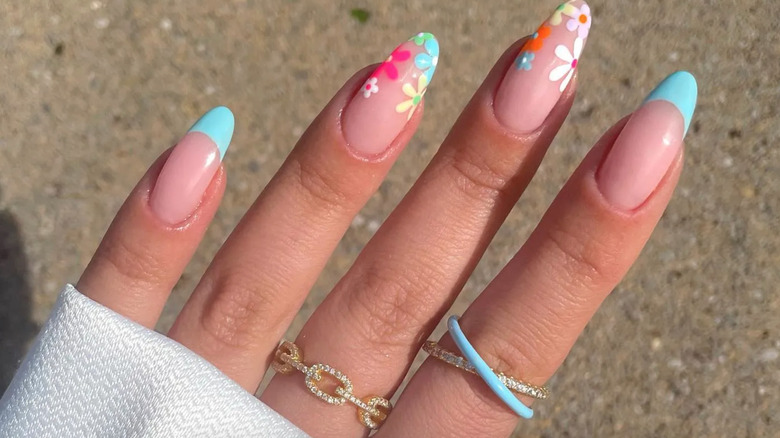
This bold manicure created by @naileditbeauty was tailor-made for summertime, adding a funky floral spin to a classic French manicure. To recreate this colorful nail look, first select a bold color for your nail tips. Then, select at least three additional colors for the floral accent nails. To create the floral nail tips, use a nail dotting tool or a small nail brush to draw daisy-like blooms falling off your nail in a variety of colors. Coordinate with your French tips by incorporating a few blooms in your chosen tip color. Then, dot each flower with a contrasting color from your chosen color palette to complete the look.
If you've mastered the at-home French manicure, this spin on the style is super east to recreate yourself. But if you struggle with keeping a steady hand, a professional nail artist will knock this one out of the park on your behalf.
Smiley Face Flowers
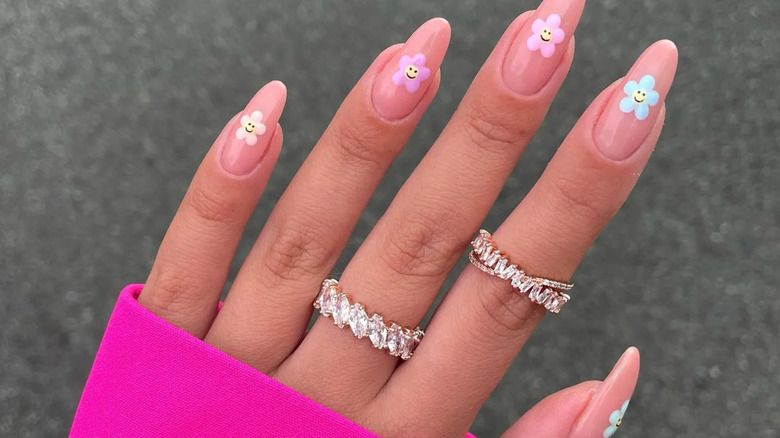
Add a dose of happy to your nails with this statement smiley face flower manicure created by Instagram user @naileditbeauty. To recreate this simple nail art, lay down a solid base coat, then use a nail dotting tool to create five-petal flowers at the center of each nail. Make sure the pale yellow bloom center is big enough to fit a sweet smiley face. To create the happy face in the flower center, dip a toothpick in black polish and draw the smiley. You can also use a super fine tip marker if you have one on hand — just make sure to use a top-notch top coat, as marker is easily removable from glossy polish.
This flower-forward nail art is super easy to do on your own, even if you aren't an artistic whiz. After all, using a nail dotting tool makes creating the flowers fairly fool-proof. This mani looks best with light colors, making the black smiley face stand out.
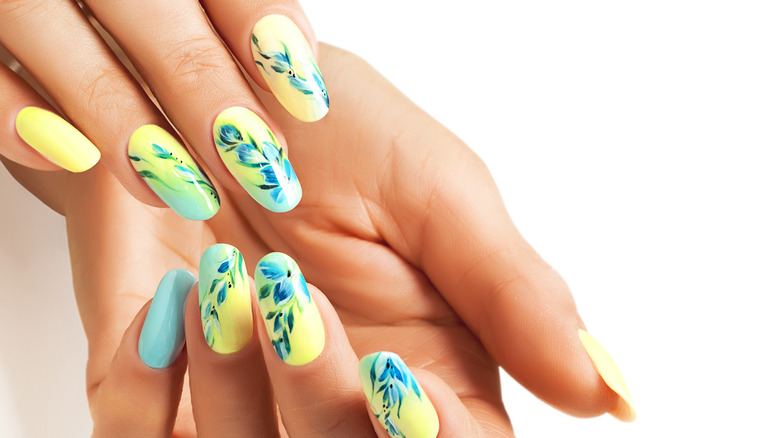
Free-Flowing Flowers
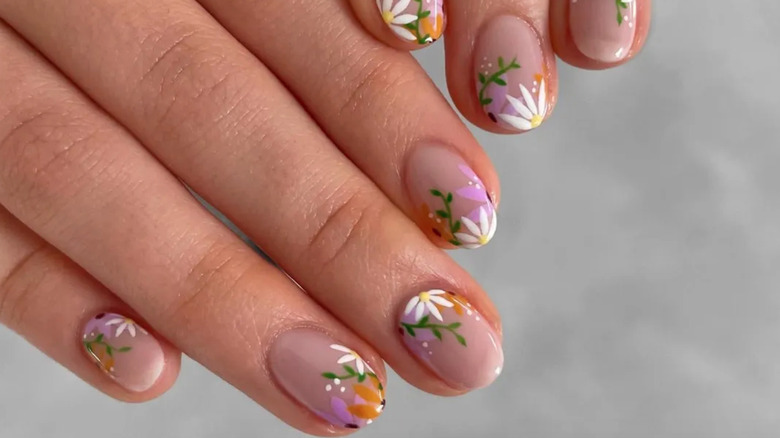
With a mix of vines and flowers, this manicure style — created by Instagram user @peachinails — cascades off the nail in a whimsical free-flowing fashion. To recreate the feminine style, use a nail brush to paint delicate flowers and vines on the edges of your nail after laying down a solid base color. Give the floral nail art different placements on each nail to add an element of interest to the design. For one nail, extend the art up the nail from the cuticle. For another, get creative with a design wrapping around your nail tip. You can even place your art running down the side of your nail bed for an asymmetric look.
Depending on how intricate you want to get with your manicure, you may want to enlist professional help to get this one right. But if you are looking for a weekend project to help channel your artistic energy, look no further.