How To Transform Your Jeans By Giving Them A Fun Distressed Look
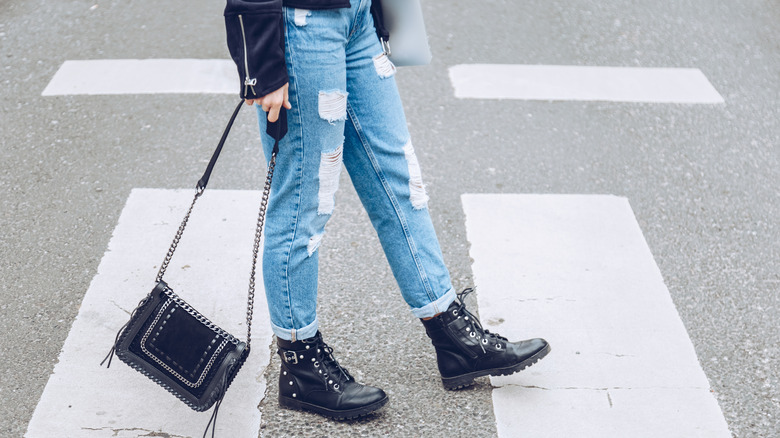
While ripped jeans first represented a mark of rebellion within the punk movement of the 1970s, they have since become a staple of mainstream fashion. Though they're still associated with '90s-inspired grunge fashion, wearing distressed denim is not necessarily a political statement anymore.
Ripped jeans were actually common in Y2K celebrity fashion, with stars like Shakira and Christina Aguilera sporting low-rise jeans with plenty of strategically placed rips and tears. Given this, it's no surprise that Vogue reports the reemerging popularity of ripped jeans as high-end fashion brands and well-known celebrities have readopted the style.
If you're wanting to hop onto the trend or finesse a pair of jeans you thrifted, you don't have to worry about breaking the bank to achieve the distressed look. While manufactured ripped jeans can be really expensive, DIYing your own is simple and cheap with just a few simple items. Once done, you'll have no problem styling your newly transformed, ripped jeans.
Begin the distressing process by preparing your jeans
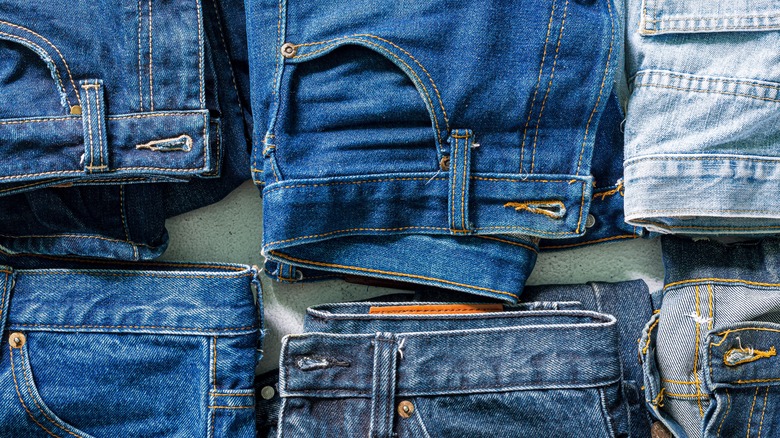
To start the jean distressing process, it's essential to select the right pair of denim and prepare them for DIY. YouTuber Professor Pincushion explains that different denim variations will distress differently, so be mindful of the thickness of the jeans you choose to transform.
While lightweight denim is especially susceptible to distress, stretchy jeans that contain spandex won't react like traditional denim. WikiHow suggests selecting a pair of jeans that is at least 20 ounces, or 1.25 pounds, which is information you can find on the denim's label.
Once you have decided on a pair of jeans, you can move on to the planning phase. When deciding what kind of distressed look you're going for, it's helpful to refer to photos of distressed jeans or pairs you already own for inspiration and guidance.
Then, you can use a pencil or chalk to mark areas for major holes. It's also worthwhile to slip into your jeans on for this step to get an idea of where the holes will fall when you wear them.
An optional step is to use sandpaper on the areas where you plan to create holes to prepare the fabric and add an additional weathered look around the area. For this, and the subsequent distressing, place a piece of cardboard, magazine, or other thick material into the jeans so that you're only distressing one side of the denim.
Use everyday items to create big or small holes
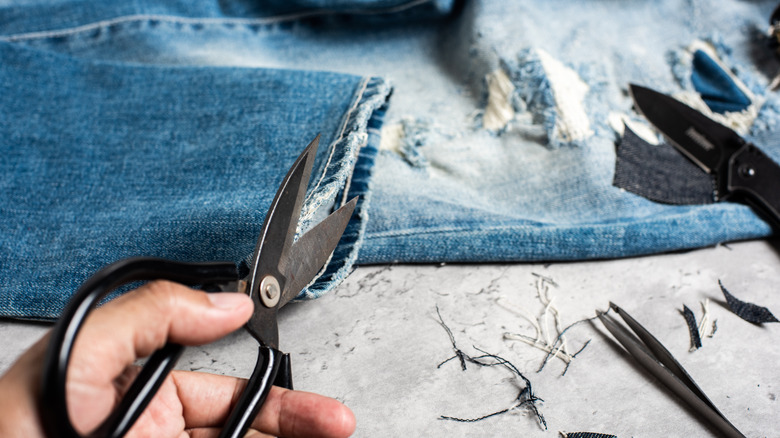
Next comes the actual distressing. Depending on your inspiration, you might create small damaged areas, big holes, or a combination of both. For large holes, you can use scissors and tweezers, as explained by Cosmopolitan.
Using the markings you drew, cut horizontal lines into the jeans. How many lines you cut will depend on the look you're going for, as multiple cuts will create a cluster of horizontal tears while two lines will create one main hole.
Next, take a pair of tweezers and pull out the blue threads between the cut lines. This might take a while, but the process will expose white, horizontal threads, creating a distressed look. If you want a visual explanation, then check out the video from Ricely Estela.
Bobby pins provide another method of distressing, as explained by YouTuber Nia B. For this, remove the casing on the flat side of a bobby pin and repeatedly scratch it over your jeans, using a back-and-forth motion. This creates a fluffy, frayed look and can be used to create small areas of damage or large, frayed holes.
To finish up, you can go in and fray the edges of the jeans, specifically the pockets and the cuffs. This can be done using the tools we previously mentioned, but a safety razor is great for achieving that weathered look. Finally, washing your denim will bring out the fraying edges and complete the distressing process.