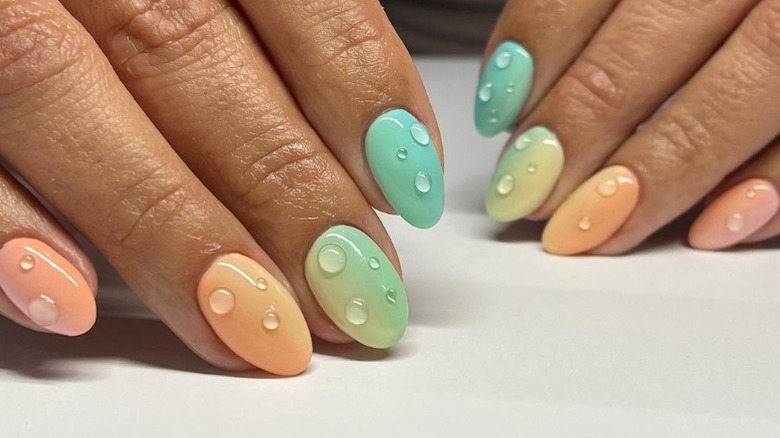
Raindrop Nails Are The 3D Manicure Technique Going Viral. Here's How To Get The Look
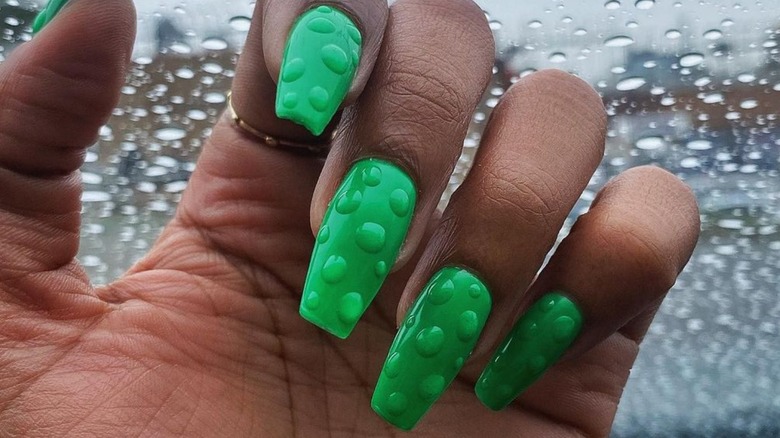
Sweater-inspired nail art is the perfect way to warm up winter days but you can artfully embrace the changing seasons by trying out another fun, viral technique — raindrop nails. Essentially, raindrop nails are a manicure trend that's quickly gaining traction online, where tiny droplets of clear top coat nail polish are applied over painted nails. The droplets are created in varying sizes to mimic the look of natural rain and to create a dynamic, 3D effect.
The raindrop nails trend has taken over TikTok and has been embraced by artists all over the world as a result, perhaps due to its versatility — the raindrops look really eye-catching on nails of any color, shape, or size. A skilled nail technician can, obviously, create this look for you in the salon. However, as long as you have some time to practice and the right tools on hand (no pun intended), you can recreate the 3D raindrop nail trend from the comfort of your own home.
Preparing your nails for the rainfall
To achieve the dewy and refreshing 3D raindrop nail look, you will need several staples — namely, a base coat polish, your color of choice polish, and a top coat polish. For the raindrops themselves, you'll need a thicker gel top coat and something to apply them with, such as a toothpick, a dotting pen, a fine art brush, or a combination of all these tools. Be prepared that this will take some trial and error too, so be as patient as possible.
The first step is adding your clear base coat. Be sure to paint at least two coats of polish on top of that before sealing everything in with your top coat. When choosing a polish for this trend, a matte top coat is recommended. You can use a shiny top coat instead, but if you do so, wait for your nails to completely dry before applying the raindrops. If your nails are too wet when they're applied, the drops may slide and lose their shape.
Achieving the raindrop nail look
Once your top coat is dry, it's time to make it rain with your gel top coat. If you are using a brush to create the raindrops, you can apply them directly to your nails by painting them on. If you are using a toothpick or dotting tool instead, you will apply the top coat to your tool. Then, let the top coat drip down and land on your nail in a dollop shape. You should practice your technique of choice on something other than your nails first to ensure you get the desired look.
When using a toothpick or dotting tool for this technique, be sure to keep it close enough to the nail so the raindrops do not spread out too much once they hit the surface. You also want to be mindful to not hit your nails with the tools and risk smudging or chipping the paint. As you apply the raindrops to your nails, you can take turns using multiple tools to create drops in different sizes and shapes.
You do not need to add a top coat over the raindrops. Once they are on, just let them dry fully to avoid smudging. That's it, you're all set!