Recreating The Runway Favorite 'Rose Bun' Is Simpler Than It Looks
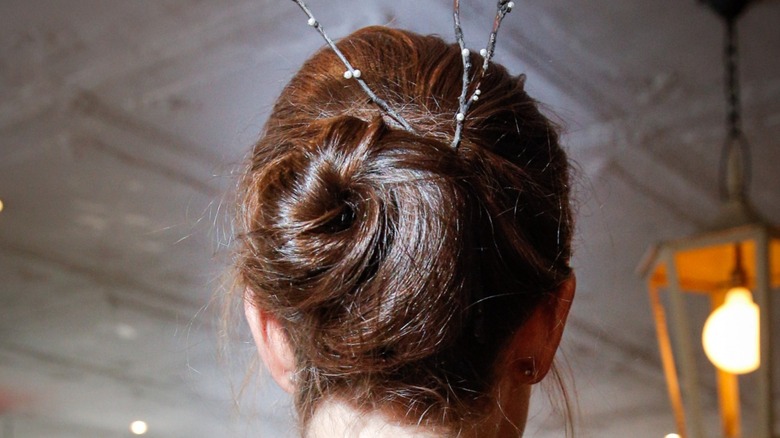
The runway season for 2023 gifted us tons of hair inspiration, including slicked-back wet look styles, unusual ponytails, baby curtain bangs, and lots of sleek updos. However, one of the cutest hair trends that also happens to be a runway favorite is the "rose bun". Put simply, the rose bun is exactly what it sounds like — a bun designed to look like a beautiful rose. This can be tightly wound like a rosebud, or looser for an elegant petal effect.
Speaking to Allure, creator of the rose bun for the Jason Wu 2023 fall show Jimmy Paul called the hairstyle "a flattering look" that "can be easily dressed up or down." Paul isn't the only stylist to take inspiration from nature, either. Hairstylist Lacy Redway, who recreated the rose bun for Cristian Siriano, told Allure that the beauty of the rose bun is its uniqueness, stating, "just like flowers, each bun should take its own personalized form."
We've got all the info about how to recreate a rose bun at home, as well as what you'll need to make it look runway-worthy.
Recreating the look is easier than you'd think
To start out, you'll need to gather up all the right tools. You'll likely have a blow dryer, heat protectant spray, bobby pins, hair ties, and hairspray, but you may need to hunt for a transparent hair net and some mousse. As with any hairstyle that uses heat, ensure the entirety of your hair is covered in heat protectant before you begin. Redway also recommends working in mousse around your hairline, as this will help you when assembling your bun. You don't want your hair to be crunchy, though, so make sure you have even coverage.
Next, slick back your hair so it's prepped for tying back, and give yourself a salon-worthy blowout at home. Once done, pull your hair back into a tight ponytail. This is your base, so it's important to make sure it looks smooth. If the ponytail method isn't working for you, try @jennypenaxo's method of braiding your hair in small sections instead. A good alternative if you don't have a high-tech hairdryer, braiding your hair will also make it easier to wrap around when creating your bun.
There isn't just one way to achieve the style
Now, onto the difficult bit — assembling your rose bun. Redway recommends splitting your ponytail into four sections and using hair nets to secure each section. To begin, take a section and twist toward the middle. This is the center of your rose bun. Repeat with each section of hair, wrapping the hair in a layered motion until the bun is completed. If you used the braiding method, you can skip this bit and simply wrap the braids around each other until your rose bun is formed (securing with lots of bobby pins, of course).
If this sounds too difficult, Paul has a different method. He states to take your ponytail and twist it all at once into a rose bun shape, using your free hand to keep the bun in place. Once finished, use as many bobby pins as you need to ensure your bun won't fall apart. You'll want to finish with a fine mist of hairspray.
Remember, you don't have to put all your hair up. TikToker @hannahwarling demonstrates how you can leave the majority of your hair down for a chic accent style that's less difficult to execute and more suited to casual occasions.